Hello Friends,
Today it is all about tips and guideline to mail handmade cards. Please note this is only a guideline and tips. If you are not sure please visit your post office. What I am sharing today is my experience and no I am NOT a certified mail clerk. So again these are guideline and tips only.
I have a video at the below or you can view on my You tube Channel. Many extra tip in this video. For dark cardstock, embellishment and more worth watching.
The main reason for this post is many time, I hear people say they dislike Note Card cause they can not mail them. Well that is incorrect the note cards are a perfect size to be mail with no extra postage, that is if you don’t over layer them. The size is accepted. So keep reading I have lots of great info.
USPS Guideline

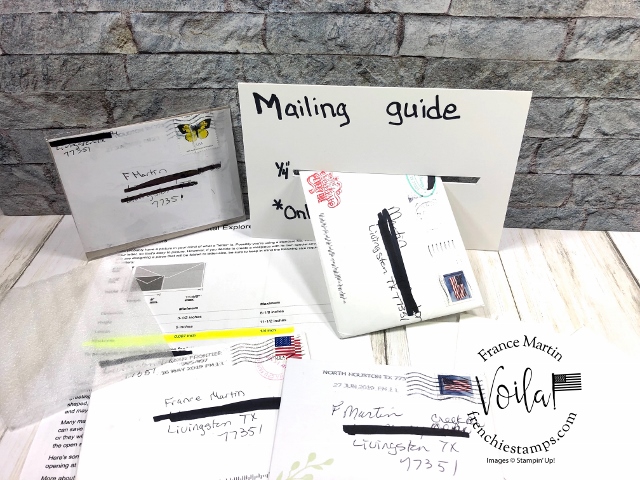
First I want to share a very informative article. See picture above that is from the USPS site the guideline size for mailing cards/letters. To view the full article CLICK HERE. Again what I’m about to share today, it’s my experience I am NOT telling what exact amount of stamp you need but a guideline of what you should need. If you are not sure on how many stamps or what stamp to add to a envelop, go to your post office for the exact amount.
If you stay in the guideline show above, height minimum 3½ and max at 6-1/8, length 5″ minimum and max 11½ keep it at 1 oz or less and not thicker then ¼” then you should be safe for one first class stamp. If it is thicker then 1/4″, I use the 2 oz stamp, they are .21 cent more then the first class stamps. Also if you have embellishment that make it bulky I suggest that you use the “butterfly stamp” they are the non machinable stamps. Also the non machinable stamps are .21 cent more then the first class stamps.
How to make your mailing guide

For the mailing guide I use 4 piece of card stock cut a slit of ¼” inch in the center and adhere all piece together. Then you can slide the cards in, to see if it is in the 1/4 inch or less. All is show in the video.

When using the mailing guide, it have to slide easy. You shouldn’t have to put pressure to push it in trough. If you have to put some pressure then you need the 2oz stamps or non machinable stamps.
What to do when you have embellishments

When you add embellishment onto the front of the card that can be tricky to mail. The mail goes into a machine and the pearl, rhinestone and such can get push out of the envelop and even tear your card. Like I explain in the video you can add a piece of foam on the top or emboss a piece of card stock the size of your card front and place on top. This will protect your card and embellishments.
Again make sure it is not over the ¼ inch thickness, if it is then add the non machinable stamp.
The best embossing folder to use to make the cover to protect your embellished card are the 3-D folders. I will have a list of the folder that I recommend to cover the embellished cards.
Can you mail a cards in clear envelops?

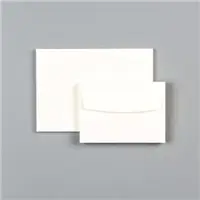
You bet, you can use the clear envelop to mail your pretty cards. I love to get cards in the mail in a clear envelop. It put a smiles on my face the minute I open the mail box and see that pretty card.
To mail in a clear envelop you need to use the non machinable stamp and make sure you place the stamp on the OUTSIDE of the clear envelop. Picture above is the front of the card in the clear envelop and picture below is the back of the card. I slide a piece of copy paper with the address and return address. Seal and place the non machinable stamp on the out side. Where to get the clear envelop, in my online store link below.

Tip video
Extra tip in the video for mailing card using dark cardstock. The basic black need extra attention when using it for card base. All explain and share the result in the video.
Supplies
The list of supplies below are supplies that I recommend above and the clear envelops. For the embossing folder I only list the one that I use. Note that I also love the Tufted but this one is not available at this time.
Just click on the image to order.


Customer Appreciation
 All order of $50.00 or more before tax and shipping place on my online store with Hostess Code KEUZBSEZ will qualified for this month projects download.
The PDF’s are design by Frenchie’s Team and the Passport Pals.
If your order is between $40 to $49 and you enter the hostess code you will received only one PDF, the one design by Frenchie’s Team.
This month PDF include 13 cards and one apple box.
PDF include all measurement, instruction, supplies list, individual pictures.
All qualified order will receive the download by e-mail in less then 48 from the time the qualified order is place. CLICK HERE to shop.
If your order is over $150 DO NOT enter the hostess code and you will get all the stamping rewards and I will send you both PDF.
Have a lovely day!


Hi Frenchie! You have supplied such invaluable information about mailing our cards!
Some of this information I already knew, however, it’s great to be reminded about all the tips & tricks you have supplied here! I did not have the USPS Guideline that you have included nor have I cut a 1/4″ slot in card stock, as you did here! Great information that you have gone through the trouble of explaining! I will definitely print all this. So kind of you & thank you so much!
Hi Frenchie I have not had good luck mailing gel cards. They have leaked. I have tried putting less gel and have even taped all around and still no luck. Maybe they should not be mailed?? Any suggestions?
What a practical video. Thanks so much for this. I try to avoid extra-postage cards or find ways to mail them so they don’t clog the postal machines.
Hi Frenchie,
I made my template years ago from chipboard. I used an empty cereal box. I have mailed the clear envelopes with no extra postage. You shouldn’t need any if it’s not too thick.
Thank you. I didn’t know about the non-machinable stamps. I wish I’d known about this sooner, but I do now!
Thank you so much for doing this. It was super helpful and I knew it was a lot of research for you. You’re the best.