
Hello Stampers,
Today I am sharing how to dry emboss with the Stitched Leaves Dies. This is such a great technique for a background layer. I love how deep it emboss. In the picture above you can see the raise emboss on the right and the deboss on the left. It is the same technique one show one side and the other one the other side. Both are great for a background.
I have the how-to video below or you can view it on my YouTube channel.

Sandwich to emboss with dies
This is using the Stampin’Up! Stampin’ Cut & Emboss machine. If you have a big shot I also share this technique way back and that video is at the end on the one below. You may have to adjust the shim so do at your own risk. We will have an impression mat but it is NOT available yet so I used the silicone craft sheet.
Here how to set my sandwich
- Platform #1
- Clear Plate #3
- Silicone Craft Sheet
- Card stock
- Stitched Dies. The raised side (cutting side) facing down onto the cardstock.
- Clear Plate #3
- Shim: I use 2 pieces of the backing of the Designer paper that would equivalent to 2 pieces of thick whisper white cardstock
- Pass through the cut & Emboss machine.
- VOILA! you have a beautiful emboss cardstock.

Shimmer Mist Recipe
On the leave, I spritzed some shimmer mist for the sparkle. Here how to make your own shimmer spritz.
- Filled the Stampin’ Spritzer 3/4 full of 70% Alcohol
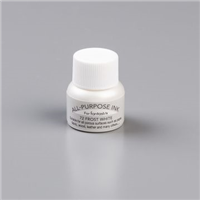
- Add 3 to 5 drops of the Frost White Shimmer paint
- Shack well and then ready to spritz
When you spritz your cardstock keep the spritzer about 10 to 12 inches away from the cardstock. this will give a nice light shimmer to the cardstock.

How-to Video
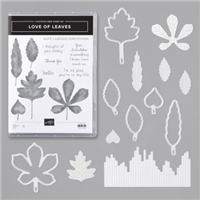
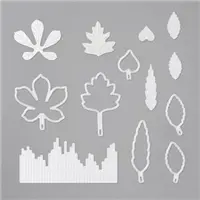
Supplies for today project
You can purchase all of the supplies used for today’s project by clicking on the product images below ↓ or you can click ADD ALL to Cart, this will add all the supplies to your shopping cart. Then you can remove the items you do not need. The ADD ALL to Cart Option makes it easier and you will not have to go back and forth to my page.
Don’t forget to EDIT your cart as needed. If you need additional items, you can also click continue shopping and add them to your order as well.
Thank YOU for your support and business.
Customer Appreciation
 All orders of $40.00 or more before tax and shipping placed on my online store with Hostess Code SQMYPMWJ will be qualified for this month’s projects download. The PDF’s are design by Frenchie’s Design Team. Order of $40 or more before tax and shipping with the hostess code you will receive the PDF by email.
This month’s PDF includes 7 cards and a 3D project. Feature stamp sets are Lift is Beautiful and Hallow Night Magic.
PDF includes all measurement, step by step instruction, supplies list, individual pictures.
All qualified orders will receive the download by e-mail in less than 48 hrs, from the time the qualified order is place. CLICK HERE to shop with me.
If your order is over $150 DO NOT enter the hostess code and you will get all the stamping rewards and I will send you the PDF by e-mail.
Don’t forget about my “Frequent Buyer Rewards Program” Track your purchase and earn a free stamp set of your choice, or Sponge Dauber Case. For all detail and track sheet CLICK HERE. You are responsible to track your own purchase.
The greatest compliment you can give me is a referral to a friend.




I just LOVE this card!!!! Absolutely gorgeous! Thank you so much for teaching!
This is very pretty!
Thank you very much for all your cards . I always enjoy them. You are a very good
teacher. I live in France and I find funny the fact that you feel ” frenchie “, I like it.
Could you, please, send me your blog posts . For the moment I only get your
newsletters.
The French grandma