
Do you have a stash of designer paper? If so, check out these Easy Card Layout With Designer Paper. So many times, we can be timid about cutting that beautifully printed paper. But trust me, I have a few simple layouts that will put you at ease to create some beautiful greeting cards with the designer paper that is collecting dust.
Amazing Clearance Rack Refresh

Video To Share Some Easy Card Layout With Designer Paper
This video is longer than most of my videos, but I wanted to share a selection of layouts. So, instead of sharing a once-by-one design, it is all in one video. All layouts are basic and perfect for creating all occasions greeting cards with designer paper.
UPDATE 8 am MDT: The last 4 minutes of the video I lost sound SORRY
One Piece Of Designer Paper Layout
This section of cards is the most simple one that I share today. Of course, the top layer is designer paper with some elements, but we don’t need many elements when creating excellent designer paper.

Most of the cards are the exact measurement. I will list the measurement but more that some could vary by ⅛ of an inch, but overall the measurements are the same.
Measurements
- Card Base 8 ½ x 8 ½ score at 4 ¼ or 11 x 4 ¼ score at 5 ½
- Cardstock layer 4 ⅛ x 5 ⅜
- Designer paper top layer 4 x 5 ¼
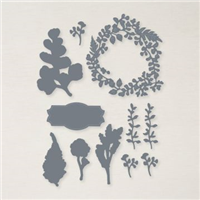
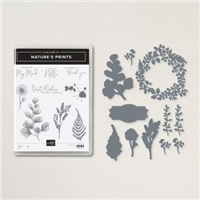
- The banner under the frame from Natural Print Dies 4 x ½ could be broader or skinnier.

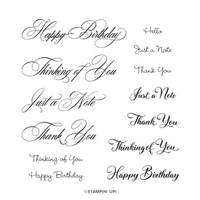
The frames for the greeting are all frame die from Natural Prints. The card below the frame is folder ¼ in the back.

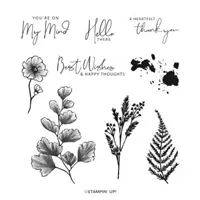
I bet many of you will agree that when we have beautiful prints like these, we don’t need to do much to get the wow effect.

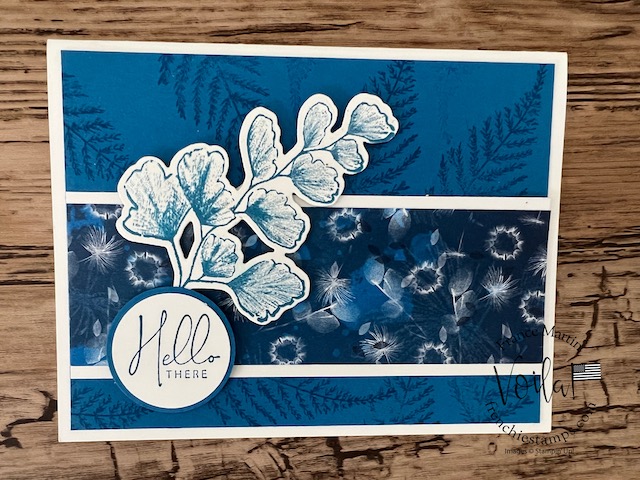
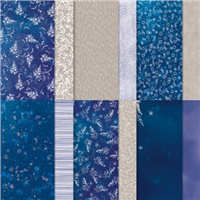
This card above I stamped on the Sun Prints designer paper.
One Layer Split Reverse
The following selections of cards are the exact measurements then the card but cut at about 1 ½ or 2 inches and flip a section to get the two prints.

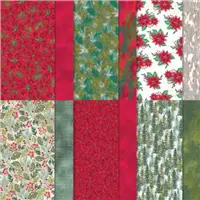
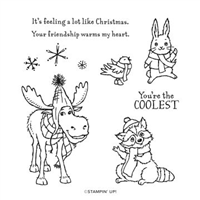
The top cards are with the Sun Prints and below with the Boughs Of Holly. The landscape or portrait layout works perfectly for the split flip of the designer paper just, depending on the pattern of the paper.

Mixing Two Print For Split Flip Layout
These two cards use two different prints of 5 ¼ x 4 cuts at 2″ and then mix the two papers. See the green strips on with the poinsettia, which is the holly print’s portion.

Strips Layout

The strip layout also can be in the landscape or portrait style.
Measurements
- Card Base 8 ½ x 8 ½ score at 4 ¼ or 11 x 4 ¼ score at 5 ½
- Cardstock first layer 4 x 5 ¼
- Cardstock first layer 3 ¾ x 5
- Designer paper top layer strip of 1 ½ x 4 ⅞ and 2 x 4 ⅞

The banner for the greeting is part of the Label Me Lovely Punch. I share how to create this in the video.

The card with the Sun Prints and the little branch element are part of the Natural Prints dies.
This card at the top is a strip of Sun Srint Designer paper left from another project, but it is an excellent layout for a used scrap. I stamped on the middle layer.
3 x 5 ¼ Diagonal Layer
The diagonal layout is simple but with that extra wow factor. All is explained in the video.

Measurements
- Card Base 8 ½ x 8 ½ score at 4 ¼
- Designer paper 3 x 5 ¼
- A strip of card stock 2 of 6 x ½
Left Over Scrap

So often, when creating with designer paper or cardstock, we have some odds size leftover paper after finishing a project. My best advice is to place a piece of about 4 ⅛ x 5 ⅜ card stock and lay out the scrap on the cardstock until you get a pattern you like. It is no wrong way to create with scrap paper. Check these two cards.
The top card is three strips of 4 x 1 ½. I have ½ inch gap between the first strip and the second it gives me an excellent section to add the frame for the greeting and some bling. It doesn’t have to be equal between each section. When it is ununiform, I say it adds some character.
The card below is two pieces of 2 x 2 ¼ and one at 1 ½ x 2 ¼.

Wow, there are lots of samples to create with designer paper. Did I inspire you to cut that beautiful paper?
Supplies for today’s project
To purchase the supplies used for today’s project, click on the images below ↓and add them all to the cart.
Also, don’t forget to EDIT your cart as needed; click continues shopping if you need additional items. In conclusion, you can edit the shopping cart at any time while you are shopping.
Thank YOU for your support and business.


Customer Appreciation
 FYI, Team members get access to the monthly customer appreciation each month.
Orders of $40.00 or more before tax and shipping placed on my online store with Hostess Code 29AA2VF2 will qualify for this month’s project download. This month’s focus is the Colors Of Autumn.
This month’s PDF download includes six cards, including some fun folds, 3-D Treat Box, and treat bags. In addition, the download contains all measurements, step-by-step instructions, a supplies list, and individual pictures. Frenchie’s Design Team designs the PDF.
After placing a qualified order, you’ll receive the download by email in less than 48 hours. CLICK HERE to shop with me.
If your order is over $150, in this case, DO NOT enter the hostess code. You will get all the stamping rewards, and I will send you the PDF by email.
Not to forget my “Frequent Buyer Rewards Program” so you may want to track your purchase and earn a free stamp set of your choice, or Sponge Dauber Case and more choices. For all detail and the track sheet, CLICK HERE. You are responsible for tracking your purchase.

Have a lovely day!

Never miss the latest news.
Subscribe to receive newsletter and blog posts delivered to your inbox.
Till next time Happy Stamping!

Meanwhile, the greatest compliment you can give me is a referral to a friend. Many thanks for considering my request.


No sound at the end of your video 😢????
Oh shoot Carole I had no clue the sound stop sorry😟