
If you like fun fold and interactive cards, I bet you want to check what I’m about to share. Today Z Fold with a popup center is a perfect layout for all occasions from birthdays, thinking of you, just because, and more.
I have some great tips to share with you all to make this fun fold card easy to create your own. The picture never does justice when showcasing a 3-D card but trust me, this layout has quite a dimension in the pop-up.
I bet you are wondering where you would write and sign this card. No worry, the back of the card is all decorated to write and sign off.
How to create a Z Fold With A Pop Up In the Center
In this video, I share tips on creating the Z Fold with the pop-up. I have two sizes for the pop-up, the half-inch, and the one-inch. This Z Fold layout fits in an A-2 envelope, so our regular size car is 5 ½ x 4 ¼.
Half Inch Pop Up Center

For both cards, a half-inch or one inch, the card base and square (diamond) are all the same sie the only part of the card that is different is the mechanism in the center for the pop-up. Trust me; these cards are very easy for an interactive card.

Measurement
- Crumb Cake 5 ½ x 8 ½ score at 2 ⅛ and 4 ¼
- Basic Black 2 of 1 ⅞ x 1 ⅞, 3 x 3
- Basic White 5 ¼ x 4, 3 x 3 for the flower
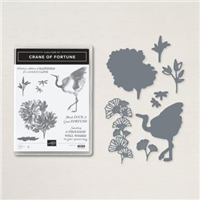
- Symbols of Fortune Designer paper 4 of 5 ⅜ x 2, 4 ⅛ x 5 ⅜, 2 of 1 ¾ x 1 ¾
Mechanism color of your choice: this is the one in the center score of the card base ¾ x 2 scores at ½, 1, 1 ½. I added an extra piece to keep the cardstock pop-up to reinforce the centerpiece. This piece is ½ x 1½ score at ½, 1. The additional piece for in Z shape and adhere to the right-hand side about one inch for the edge of the card.


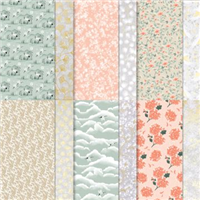
This one is the same size but with the Flowering Field designer paper
- Poppy Parade 5 ½ x 8 ½ score at 2 ⅛ and 4 ¼, 2 of 1 ⅞ x 1 ⅞, 3 x 3
- Basic White 5 ¼ x 4
- Flowering Field Designer paper 4 of 5 ⅜ x 2, 1 x 5 ¼, 4 ⅛ x 5 ⅜, 2 of 1 ¾ x 1 ¾, 2 ¾ x 2 ¾
All three top layers of the square are designer paper. I stamped on the designer paper.

One Inch Pop Up Center

For the one inch, I added the designer paper in the center. It is a trick to add a pattern paper on a diagonal. I shared how to in the video. Then, using the four corners of the designer paper from the center, I adhere them to the inside corner of the card base.
Measurements
- Basic White 5 ½ x 8 ½ score at 2 ⅛ and 4 ¼, 2 of 1 ¾ x 1 ¾, 1 ¾ circle
- Highland Heather or Evening Evergreen2 of 1 ⅞ x 1 ⅞, 3 x 3
- Flowering Field Designer paper 4 of 5 ⅜ x 2, 4 x 4 is for the center, and the corner will be for the inside,


I didn’t stamp the yellow tulips card; I added a strip of ½ x 5 ¼ of the designer paper.

The purple card the square are in Highland Heather, and the back layer is Blackberry Bliss for an extra layer.
Now for the easier way to assemble, refer to the video above.
Supplies for today’s project
To purchase or view all of the supplies used for today’s project, click on the images below ↓Click add all to cart.
Also, don’t forget to EDIT your cart as needed, click continues shopping if you need additional items. In conclusion, you can edit the shopping cart at any time while you are shopping.
Thank YOU for your support and business.


Customer Appreciation
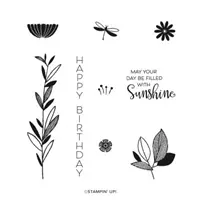
 Orders of $40.00 or more before tax and shipping placed on my online store with Hostess Code H3SV6XVQ will qualify for this month’s project download. The focus product this month is the Symbols Of Fortune Suite.
This month’s PDF download includes seven unique projects. All measurements, step-by-step instructions, supplies list, individual pictures are part of the download.
Frenchie’s Design Team designs the PDF.
After placing a qualified order, you’ll receive the download by email in less than 48 hours. CLICK HERE to shop with me.
If your order is over $150, in this case, DO NOT enter the hostess code. You will get all the stamping rewards, and I will send you the PDF by email.
Not to forget about my “Frequent Buyer Rewards Program” so you may want to track your purchase and earn a free stamp set of your choice, or Sponge Dauber Case and more choices. For all detail and track sheet, CLICK HERE. You are responsible for tracking your purchase.
Have a lovely day!

Never miss the latest news.
Subscribe to receive newsletter and blog posts delivered in your inbox.
Till next time Happy Stamping!

Meanwhile, the greatest compliment you can give me is a referral to a friend. Many thanks for considering my request.


Beautiful card Frenchie! Am I somehow missing the spot to print out all of the measurements for cutting the cardstock and DSP?
Hi Holly I don’t have a download for this card but you can highlight the section of blog post you wish you want to print
Thank you so much for sharing.
Great card.
You are welcome Mary.
Thank you so much Frenchie. You are teaching me so much, just love your cards. Can’t wait to have the ladies in my class make these. We made the northern lights card, they flipped over it! I always make sure to let them know the demo who made the card.. Thank you again. Hugs
So glad you like what I share enjoy
The Mystery stamping card which was supposed to be on you tube at 11:30 was already in progress and I missed the beginning of the card, is it available on you tube to follow?