
Hello Stampers,
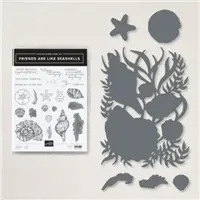
Today I am sharing basic tips for the Sea and Sand Suite. Stamp Set Friends Are Like Seashells, Seaside Seashells Dies, and Seashells 3D Embossing Folder. We never had 3 coordinated products like this in the past. I say it is the BOMB. I so love this suit so I am warning you that you will see many more posts with this suite.
Okay Now try to say these 3 products 3 times in a row. OH! That is a mouth full.
I have a great tip video below or you can view it on my YouTube channel.
Tip to align stamp, die, and embossing folder

I explain it all in the video and also you can see the graphic above. After you watch the video you will see how quick it is to align all from stamp image to die to emboss folder. As mention above we never had 3 products coordinated like this before. It is amazing plus it is beautiful.
Stamp, Die-Cut and Emboss

Both of the cards I stamp and die cut. Only the one on the left that I embossed. Here how to do all 3.
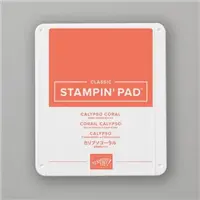
- On a 4 x 5¼ or 4¼ x 5½ align your stamp on the Stamparatus and stamp. (Left card, is only one color Crumb Cake. Right card ink with Pool Party sponge lightly Crumb Cake and Calypso Coral)
- Alight the stamped cardstock with the ONE die and die-cut.
- To emboss alight the die-cut cardstock in the embossing folder and emboss.
These all alight nicely and simple. The main focus needs to align your stamp first on the Stamparatus using the die to align them and all will align perfectly. I strongly recommend watching the video to see how it is all done.

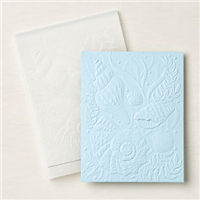
Close up view of the 3D embossing folder. This is such a nice deep and detail embossed image.
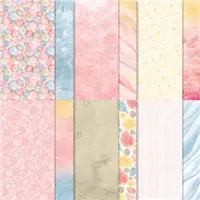
The back layer is the Sand & Sea, Designer Paper.

The little embellishment they are the Opal Round. These opals have the speckle of colors that look like my opal ring so pretty.

This one is NOT embossed but I use 3 color ink to give some depth on the shells.
Simple with white and vanilla


The one on the left I emboss then assemble on the card front. The one on the right I die-cut, emboss then assemble. All are simple and quick.

Adding Ink

These ones I stamped with Crumb Cake ink. The top is embossed below not emboss.

Basic Tip Video
Most of the cards are all the same measurement.
- Card Base 11 x 4¼ score at 5½
- Designer paper (optional) 5¼ x 4
- Top layer 5¼ x 4 that is if you emboss or die-cut I used the same size
I did many more cards with this suite. I am sure you see many more cards in the video. I will have more posts in the coming weeks to share the other ones.
Supplies for today project
You can purchase all of the supplies used for today’s project by clicking on the product images below ↓ or you can click ADD ALL to Cart, this will add all the supplies to your shopping cart. Then you can remove the items you do not need. The ADD ALL to Cart Option makes it easier and you will not have to go back and forth to my page.
Don’t forget to EDIT your cart as needed. If you need additional items, you can also click continue shopping and add them to your order as well.
Thank YOU for your support and business.

Sale A Bration Rewards
 January 5th to February 28, 2021, all orders of $50 before tax and shipping qualified for Sale A Bration rewards. It is 2 categories of product one at $50 and one at the $100. It is NO limit on how many rewards you can earn. EX: $50 order one reward, $100 order 2 of the $50 section or one of the $100 section and so on.
Also, orders of $150 before tax and shipping receive the Stampin’ rewards (see page 187 of the annual catalog for Stampin’ Rewards) Order of $300 before tax and shipping will receive a bonus stamp set “Punch Party” this is all orders of $300 or more no need to host a party.
All detail of Sale A Bration CLICK HERE
Customer Appreciation
 All orders of $40.00 or more before tax and shipping placed on my online store with Hostess Code 92AANC2R will be qualified for this month’s project download. The PDF’s are design by Frenchie’s Design Team. This month I “Frenchie” designed the cards.
Order of $40 or more before tax and shipping with the hostess code you will receive the PDF by email.
This month’s PDF includes 6 cards and a mini box. Showcasing The Fine Art Floral Suite.
PDF includes all measurement, step by step instruction, supplies list, individual pictures.
All qualified orders will receive the download by e-mail in less than 48 hours, from the time the qualified order is place. CLICK HERE to shop with me.
If your order is over $150 DO NOT enter the hostess code and you will get all the stamping rewards and I will send you the PDF by e-mail.
Don’t forget about my “Frequent Buyer Rewards Program” Track your purchase and earn a free stamp set of your choice, or Sponge Dauber Case. For all detail and track sheet CLICK HERE. You are responsible to track your own purchase.
The greatest compliment you can give me is a referral to a friend.







Lovely……..Thank you for the explanation of this suite!
You are so welcome it sure is a awesome suite
Thank you so much for all the tips and tricks. You made it so easy to create something beautiful. Your examples are very creative and helped me come up with some of my own.
Great tutorial!
You really did help me to understand all this. Thanks so much.
Sue
You are so welcome. Glade it help
Awesome. Thank you for all the great tips!
Frenchie. 🙌🙌🙌
What a great tutorial. The video is fantastic and I will certainly be giving these cards a go.
Your followers from Australia and elsewhere really appreciate you sharing these with us.
Cheers Marthea
I have watched several videos on how to use this set, yours was the best 🙂
Thank you for the sweet comment
Terrific ideas!!
Thank you so much for your tips and explanations. Beautiful cards.