
Hello Stampers,
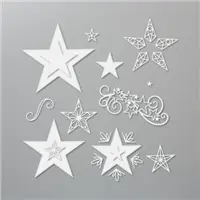
Today I am sharing how to make a window with the Sting Art in the center. I am using the Stitched Star Dies. I did the video and cards for SplitCoastStamper last week. Maybe you saw the tutorial on SplitCoastStampers. You can click here to view SplitCoastStamper. I was the Guest Tutorial Author there last week.
I have the how-to video below or you can view it on my YouTube Channel.

Measurements
- Whisper White or Very Vanilla 11 x 4¼ score at 5½ Card front, ¾ x 4 for the greeting
- Blackberry Bliss 5¼ x 4

Tips to do the Sting Art with Stitched Dies
This is so simple the hard work is done for you when you use stitched die. My best advice is ONLY stitching in every other stiched and using a small gauge thread and needle. If you choose to do every stitched you risk to tear the cardstock in between each stitched.
For the window, I suggest having a smaller die for the card base and one size bigger for the layer that you stitched on. For the card base, I use the 2½ star and the layer is the 3″
You may ask how much thread to use for the stitching? I say about 2 yards is the MAX that I would do at a time, if you use more then 2 yards it wants to tangle all together. In the video, I show how to attach the thread in the back in-between each string.
Sting Art Window Showcase

I just place a piece of Coastal Cabana to showcase the string better in a photo.


The starts in the background are stamped with the White Craft ink. You may notice the smeared ink. Well, DO NOT touch right after you stamp for a while. White Craft ink takes time to dry or you can heat set with the heat tool.

I love the window so when they open the card you still see the beautiful work.
Shape String Art

This is done the same way every other stitch. So you can do the negative of the die-cut for the window and the start itself. This set of the die has stitched on both the negative and the die-cut.

How-To Video
Supplies for today project
You can purchase all of the supplies used for today’s project by clicking on the product images below ↓ Or you can click ADD ALL to Cart, this will add all the supplies to your shopping cart. Then you can remove the items you do not need. The ADD ALL to Cart Option makes it easier and you will not have to go back and forth to my page. Don’t forget to EDIT your cart as needed. If you need additional items, you can also click continue shopping and add them to your order as well.
Other products needed for this project will be some metallic thread or a fin gauge thread and a needle. Make sure the needle is small 25 mm would be the biggest one I would use. the one I use is 24 mm.
Thank YOU for your support and business.


Save the Date
Tomorrow October 3rd, 2020 It’s World Card Making Day. I will be live twice that day. All detail will be posted on my blog on the 3rd. 8 am mountain time live on YouTube and Noon live on Facebook

Customer Appreciation
 All orders of $40.00 or more before tax and shipping placed on my online store with Hostess Code FQFPMFSK will be qualified for this month’s projects download. The PDF’s are design by Frenchie’s Design Team. All orders of $40 or more before tax and shipping with the hostess code you will receive the PDF by email.
This month’s PDF includes 7 projects, Gift Card Holder, Candy Holder, Ornament, and Cards.
The feature bundle is the Poinsettia Petals.
All qualified orders will receive the download by e-mail in less than 48 hours, from the time the qualified order is place. CLICK HERE to shop with me.
If your order is over $150 DO NOT enter the hostess code, you will receive all the stamping rewards and I will send you the PDF by email.
Don’t forget about my “Frequent Buyer Rewards Program” Track your purchase and earn a free stamp set of your choice, or Sponge Dauber Case. For all detail and track sheet CLICK HERE. You are responsible to track your own purchase.

Designer Paper Sale. Click on the image for all the detail and see all 15 pack that is on sales for the month of October. Time to stock up and save.
Have a lovely day!

The greatest compliment you can give me is a referral to a friend. Thanks in advance!


Fantastic idea you’ve done on this card, it’s just beautiful.
I’ve never thought to use the stitched dies in this way, so I’ll be checking out my die stash to see what I can use.
hank you so much for sharing this idea.
I had to try the stitched star, mine turned out beautifully. I made it into a sympathy card.
Carol hope you enjoy making it They sure are fun
Thank YOU for the sweet comments they are fun to make
So glad you like it
Wow! You always amaze me! This is so stunning and elegant. Thanks for sharing.
Sue
thank YOU for the sweet comments
I haven’t done any string art since I was in elementary school. But after seeing your work, I know I will have to give it a try again. I have the stitched star dies so I can follow your instructions. I love what you have done! Thanks for another wonderful inspiration.