
Hello Stampers,
Ready for a fun interactive card. I am sharing how to make the Triple Pop Up Cube card. This is such a fun card and it not that complicated. I was inspired by Tracie St-Lois and Kim Fee thank you so much for the inspiration Tacie and Kim.
FYI after many requests last night after my live on Facebook for paper share I will have a 2nd round. Detail below.
I have the how-to video for the Triple Pop Up Cube and also in the video, I share the Glass technique. Video can be view below in this post or on my YouTube Channel.

Measurements
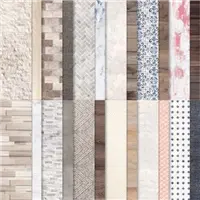
The designer paper I use on this card is In Good Taste. Also, in the video, I explain all the funky 15/16th and 13/16″ measurements. You can always change to simple layers but I love the fine border for this card and that is why I have the 16th measurements. See the video before you look at these measurements and get scared and run off.
Cube Body
- Early Espresso 8 x 8¼, Place the 8¼ at top of scoreboard and score at 2, 4, 6, 8
After scoring cut the scored she that you get 2 of 2 x 8¼ and one at 4 x 8¼
Outside layers
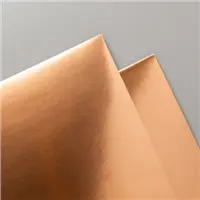
- Copper Foil: 8 of 1-15/16 x 1-15/16 (the 15/16 is just a tiny line less than the 2″), 2 of 1-15/16 x 3-15/16
- Designer Paper 8 of 1-13/16 x 1-13/16 and 2 of 1-13/16 x 1-13/16
Inside layers
- Designer Paper 8 of 1-15/16 x 1-15/16 and 4 of 1-16/16 x 3-15/16
You will also need whisper white for the glasses and very vanilla for the Greeting on the Tailored punch. In the video, I use the circle in very vanilla to get the object to stand up. Note that ofter the video I cover this pieces with the wood grain paper so it is kind of invisible.
View from all sides
The next few picture you can see all view of this fun Triple Pop Up Cube card.


Lay flat for mailing

The nest part of this pop-up card lay flat so you can mail this to a loved one.

Fit in our regular envelops. I would suggest going to the post office to see if you need extra postage due to the thickness you could need more postage then the first-class mail.

Clear Glass Technique

I love how this looks like glass. It is so simple after you color the image hand-cut and tap the Versamark ink all over and apply clear embossing powder then heat emboss. Repeat 2 to 3 times for a tick glass. All is shown in the video.
Stamp set suggestion for Triple Pop-Up Cube Card
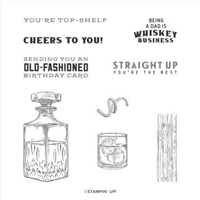
I use the Whisky Business stamp set but you can change to many other stamps. Here some suggestion for different stamp sets
- Jar Of Flowers
- Under My Umbrella
- Dress To Impress
- Beautiful World
- High Tide
- Game On
- Geared Up Garage
- Campology
- Sailing Home
- Pamper Pets
- Country Home
- Back On Your Feet
- Dino Days Way To Goat
That is quite a list and I am sure it is many more you can find.
How-To Video
In this video, I share how to make the Triple Pop Up Cube and the glass technique.
Supplies for today project
You can purchase all of the supplies used for today’s project by clicking on the product images below ↓ Or you can click ADD ALL to Cart, this will add all the supplies to your shopping cart. Then you can remove the items you do not need. The ADD ALL to Cart Option makes it easier and you will not have to go back and forth to my page. Don’t forget to EDIT your cart as needed. If you need additional items, you can also click continue shopping and add them to your order as well.
Thank YOU for your support and business.
Paper Share ROUND 2

Last night I was live on Facebook and many saw the spread of the paper for the paper share and want to take part. well, that paper is SOLD. With so many requests I decided to have a second-round but you need to act quickly. To get all the detail of the paper share CLICK HERE and all requests need to be in no later than Saturday, Aug. 8th also all invoices need to be paid by Saturday.
Customer Appreciation
 All orders of $40.00 or more before tax and shipping placed on my online store with Hostess Code 6694NRJY will be qualified for this month’s projects download. The PDF’s are design by Frenchie’s Design Team. All orders of $40 or more before tax and shipping with the hostess code you will receive the PDF by email.
This month’s PDF includes 7 cards, a 3-D project
Feature bundles are the Birds & Branches and the Many Mates.
All qualified orders will receive the download by e-mail in less than 48 hrs, from the time the qualified order is place. CLICK HERE to shop with me.
If your order is over $150 DO NOT enter the hostess code, you will receive all the stamping rewards and I will send you the PDF by email.
Don’t forget about my “Frequent Buyer Rewards Program” Track your purchase and earn a free stamp set of your choice, or Sponge Dauber Case. For all detail and track sheet CLICK HERE. You are responsible to track your own purchase.
Have a lovely day!
The greatest compliment you can give me is a referral to a friend. Thanks in advance!









Thank You SO Much for this video and all the time you take to share your wonderful creations. Bless you
Love the card France. Recently I’ve just seen Sam Calcott and Jan Brown make these as well. Love them all. A big fan here of the kinetic cards. Glad it fits in a reg. envelope. The extra postage isn’t too bad either. Be safe & TYFS
Love, love the whiskey card. The best!
Great card!
This is really, really an awesome card!
Hello France,
I have been sitting here playing, stopping, playing your video, to be able to put this card together and even though there are a few steps, it looks like it will be worth it ? I haven’t quite finished as yet, I’ve just finished the 2 smaller cubes and now the rectangular one!
I did have a question though. Where you have the measurements for the Outside Layers, for the DSP, you say you need 8 of 1-13/16 × 1-13/16, which is fine but then you say you need 2 of 1-13/16 × 1-13/16, should it be 2 of 1-13/16 × 3-13/16 (aren’t they the 2 wooden outer panels that go at the back of the card?)
If I am incorrect, I do apologise, but I just thought I would let you know in case you made a boo boo ? I love that you talked in 13/16 as it makes sense to me and I do the same when I am making cards *hehe*
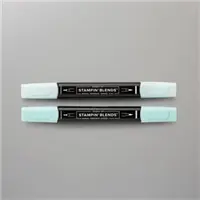
Oh and I have seen a couple of different methods of how to make the decanter and glasses look like glass, but I think your idea was the easiest for me. Oh and as I don’t have all the Stampin’ Blend pens, I was lucky I had Light Mint Macaron as I used that.
One last thing, I think your idea about covering the little circle, that holds the glass up, with designer series paper, but an alternative could possibly be a piece of acetate. I might try that once I assemble my decanter and glass, and I shall let you know how it turns out.
Thank you again for a great tutorial and I can’t wait to see the finished product! ??❤???
No what I have is correct because 2 of them are on the big one no need of the long one because it will be cover with the 2 side cube
Oh yes, that makes sense lol. Now that I have finally put it together, I understand all the pieces better. I’m sorry, I hope you didn’t take offense ? it wasn’t my intention, I just wanted to make sure! Well I finally finished the card. But as it is 2am, I shall wait until daylight so I may take a photo then.
I watches 2 other videos you made, one of your craft room (very nice indeed, just the right size for me too & so lovely and tidy!) The other one was about your stamps and wardroab and how you organize them both. Very clever indeed! Thank you, so many good ideas in both ?
Oh and one last thing, my parents are European and so I love listening to your accent *hehe* ?
Cheers for now, Heidi ???????
No problem at all all these piece and measurement can get confusing till making one 🙂
I am french but no Europ Frenchie Candian 🙂 Have a great weekend
Hello France, I am interested in watching the video tutorial for this card, but the link says it’s no longer available. Would you be able to share it with me? I’d love to make this card for Father’s Day this year! : )
Not sure what you get that message at this end it still working https://youtu.be/V67ePn66FVA?si=2GU7qChNWhWOW5d3