
Hello Stampers,
For today I have a fun fold call Corner Fold with layers. I have it for a gift card hold and also a simple way just the corner fold.
Last November I share many gift card hold and I ask one you which one you would like to see in a video. Well many ask for different one but Pauline card got the most vote so I have the how to video today.
To view the video scroll down or visit my YouTube Channel here.

Measurement
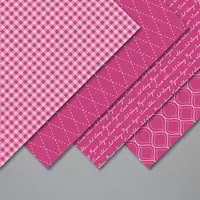
- Card Base (Bermuda Bay or Purple Posy) 8½ x 5½ score at 4¼
- Whisper White 2 of 5¼ x 4 (one for the front and one for inside) 2¾ x 2¾, 2½ x 2½, ¼ x 5½, 3 medium daisy punch out
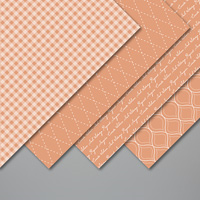
- Designer Paper to match color of the base, 5 x 3¾, 2½ x 2½


For the daisy I score all petals in the center then fold to give more depth. To be honest it is the daisy that got my attention when I saw Pauline card. I love the little extra bend to these petals.
I used stamping blends to color the bottom of the petals matching the card base or daffodil delight for the black card. The center color with soft suede blends.

Picture above you can see how a gift card slide perfect on the opening. Make sure you see how to adhere the layer in the video so you have the opening free to slide the gift card.
The simple corner fold

If you do not need the open for a gift card holder this is super simple fold. No cutting just score and fold. Here how to score and fold diagonal.
- Make a mark at the front of the card base at ¾ (measure from the center score that is 4¼) at the top
- Onto the right side make a mark at 2″ (measure from the bottom up).
- Place both mark diagonal onto the a paper trimmer track and score.
- Take the top right corner and fold to the front.
Yes it is this simple to have the same look without no cutting.
Measurement for the simple fold
- Card Base Basic Black 8½ x 5½ score at 4¼
- Whisper White 2 of 5¼ x 4 (one for the front and one for inside) 2¾ x 2¾, 3 medium daisy punch out
- Designer Paper to match color of the base, 5 x 3¾, 2½ x 2½
- Basic Gray 3 x 3

How to make the cuts
The next few picture show you how I cut my paper. These picture i bet will help you with the measurement on where to cut and NOT cut. In the video I share step by step.


I cut from the inside of the card.
- Placing the OPEN card base at 3″ mark cut from 7/8 to 3″.
- Turn and place the bottom at 2½ cut from 7/8 to 3″
- Flip the top corner to the front.
Voila You have your corner flip card with a opening for a gift card.

To cut diagonal layers

I find it easier to cut both layer at the same time. Adhere the designer paper to the whisper white layer. Very important when you adhere the layer to the cart front only adhere the bottom and left side to keep a opening for the gift card to slide in.
- At the top 4″ side make a mark on the left at ½
- On the 5¼ right side make a mark at 1½ *measuring from the bottom up
- Place both mark diagonal onto the track of a paper trimmer, cut diagonal.
This will give you the layers for the font. Also you can use the top portion for inside layer like the black card.
How to Video
In the video I share both corner fold with the gift card and without.
Supplies for all 3 card
You can purchase all of the supplies I used for today project by clicking on the product image below ↓ Or you can click ADD ALL to cart, this will add all the supplies in your shopping cart, then you can edit your cart.
This is an easy way for a one click and have all the list without going back and forth. Don’t forget to edit your cart, you can click continue shopping if you need more products.
Thank YOU for your support and business.


Customer Appreciation
 All order of $40.00 or more before tax and shipping place on my online store with Hostess Code DN6JVRAB will qualified for this month projects download. The PDF’s are design by Frenchie’s Design Team. If your order is $40 or more before tax and shipping and you enter the hostess code you will receive the PDF by email.
This month PDF include 5 cards (shaker card, flip card) and 2 3-D project (banner and mini pizza box).
PDF include all measurement, step by step instruction, supplies list, individual pictures.
All qualified order will receive the download by e-mail in less then 48 hrs, from the time the qualified order is place. CLICK HERE to shop with me.
If your order is over $150 DO NOT enter the hostess code and you will get all the stamping rewards and I will send you the PDF.


I like these cards Frenchie. Love the pocket idea and then also how you have made/put the layers on the black one. TYFS
I really like these cards! The pocket idea is awesome! Thanks for sharing!
Hi Frenchie, Love this card with the pocket. I did a couple of them a couple of years ago. I have a nephew that loves yellow as a color, so I did the card in garden green and then used the white on the inside and had gotten some very pretty glittery green paper from my daughter-in-law that I used on the front, and it went together so lovely. I didn’t have any flower punches way back then, so I just stamped a yellow flower and some green leaves on that little fold over part on the front that I had put a piece of white there. He was so tickled with it. I think he even still has it on his refrigerator–that’s what I have heard from his brother. Going to do a few more now that I have seen it here again. I did not put a greeting or anything on or in it so he could write what ever he wanted on it.
Hi Frenchie, Love this card. I did the one with the gift card part a couple of years ago. I did it in garden green and white on the inside and I had been given some very pretty green glittery dsp so I put that on the front and I used a little piece of white where you flip that corner over and then I just stamped a yellow daisy type flower and some leaves there and glued it down and it was a gift card holder. My nephew loves yellow, so that was why the yellow daisy flower and I believe he still has it on his refrigerator (per his brother) 2 years later! I didn’t put anything on the front or inside so he could use it for whatever he wanted it for.
Love this corner card. I plan to make for a baby shower. Great with the gift card. Have a Great Day!
Hi, I love these cards, going to try it. I also appreciate you tutorials. You explain so well, makes it look so easy. Thank you for sharing your talent with us all.
Hi Frenchie. I saw a post of By The Dock done in Sepia. Did you do a tutorial on this dtamp set/project. would love to case. But unsure of how to do it! Thanks in advance!!!
It is BY THE DOCK it is at https://www.facebook.com/FrenchieStamps/videos/1044053679289640/